Acknowledgments
This article is written to fulfill a promise I made to Samith Abeywickrama from the DIY Off Grid Sri Lanka group, and to Ryan Zhang of the GSO battery company of China. I would also like to thank Sofia Wang and Growatt China for the help provided on my DIY implementation of a 10KW parallel off-grid setup. I believe this will help any others from Sri Lanka, looking at the importation of Inverters and LiFePO4 batteries, or planning a setup of parallel inverter / battery off-grid systems.
Overview
Although I had joined the DIY Off Grid Sri Lanka group on Facebook for quite a few months, it was this post from Samith that really encouraged me to finally go ahead and start it. Of course, I cannot forget the 75 years of political leadership of Sri Lanka, and those who did it at its best (හොඳටම කෙරුවේ) in 2022, that really pushed many of us to finally go off-grid ;) !
My situation was slightly different from the average Sri Lankan DIY home user, since I setup two 5KW inverters in parallel with two 5KW batteries, and I also directly imported the inverters and batteries from China. Although I might not be able to reply to any questions promptly, I will still try my best to help anyone else who might find this information useful.
Importing from China
I operate a software company in Sri Lanka, which is only catering exclusively to the export market. Since the power interruptions in Sri Lanka started to adversely affect our operations in 2022 on top of the Covid-19 lockdowns, I decided to import off-grid backup power systems for the most critical members of our team, and to power our office premises, as we are under contract to provide 24x7x365 support to our customers outside Sri Lanka.
I imported 6 inverters and 6 batteries of 5KW directly from the manufacturers in China, by placing the orders under the name of my company and making payment through the USD income we receive through the export of our software. So, the first step was to register with the Sri Lanka Customs, which was a fairly straightforward process, and where both the GN and DS offices assisted us with the required forms without delays or inconveniences.
I registered at the Customs website and got the GS Forms 1 and 2 completed by the Grama Niladhari and the Divisional Secretariat offices. Since my company was already registered with a TIN and VAT number and we conducted a legitimate software export business for around a decade by 2022, we had no issues with this step, although it was our very first time registering with the customs and importing anything into Sri Lanka!
I then contacted Ryan Zhang over WeChat (+86 18715678909, sales05@gsopower.com) and he has been an absolute pleasure to work with! I am also very happy to say that the GSO batteries have worked very well for us, and that Ryan has promised to offer the best pricing for anyone else from Sri Lanka, who is interested to import from them directly. His contact details can be found at the end of this article.
Ryan was in touch with me proactively from the ordering to delivery and installation, configuration and even post installation support! I was also very lucky to be able to contact Sofia Wang from Growatt, since I had some trouble connecting with an English-speaking sales contact from Growatt initially. Sofia helped through everything very professionally, and also arranged contact with the engineers to provide the necessary technical support at all times. Also, she was very helpful during the importation process, since we had a few hiccups due to delays caused by the shipping lines and the economic situation of Sri Lanka during the time.
For importation, make sure you get a Proforma Invoice and make sure the name, address etc. matches exactly with those of your company, and lists the freight and insurance costs separately from those of the product, and that the country of origin is listed along with the HS code and any warranty etc. you want included. Here is the proforma invoice for the batteries, where I got a special price of USD 6,290 including shipping, for 6 Nos of 5KW LiFePO4 batteries. These are the exact same that Samith ordered, and his research and help saved me many hours of research, and I believe this information will help others in future too.
For 6 Nos of the Growatt SPF5000ES with the Shine wifi directly from the manufacturer, I paid USD 4,040 as per the following invoice.
When the shipment leaves China, and before it arrives in Colombo, you should receive the Bill of Lading. Make sure to ask for a 'Telex Release' so that you can clear it at the port through your agent. You will also receive a packing list and details of the vessel and its arrival details.
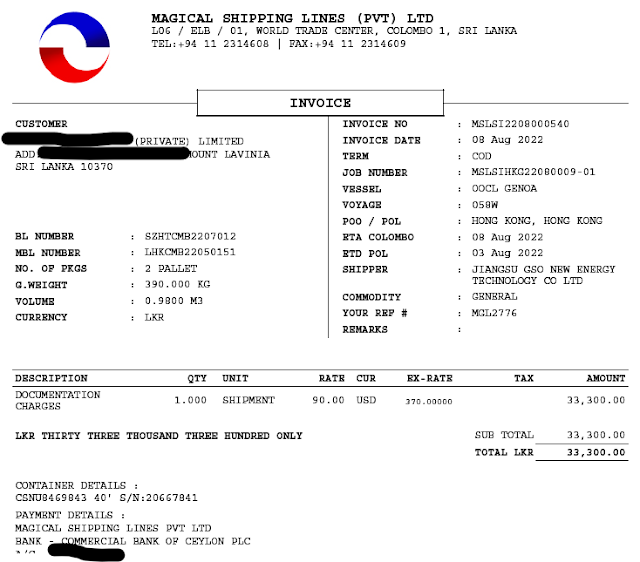
My batteries were handled by Magical Shipping Lines in Sri Lanka, who was the party assigned by the seller.
I had to pay the agents fees as shown below, and this is different from Customs duty or other clearing charges.
An amount of LKR 28,490 was charged by Seacare Forwarders, which did the processing of the inverters. A similar document set for those were processed, which I have omitted in this article.
In addition, we paid approximately $116 as bank charges for two outward remittances, and 10% customs duty and 5% PAL for the batteries, and 5% PAL for the inverters. After all costs such as local transport, clearing, warehouse etc. was added we had a net cost of USD 2,000.43 per 5KW Inverter (Growatt SPF 5000ES) and LiFePO4 battery (GSO GBP48-100W) pair, when ordering 6 Nos each. Four of these pairs were installed as 5KW units, and I combined two to build up a 10KW unit as described below.
Purchase of Solar Panels and Aluminum Structure
I purchased 14 solar panels from REC (REC 370 TP4) as it was recommended by one of my best friends, and since I had once visited their factory in Singapore many years ago, and knew it was a good product. For the solar structure, initially I got a quotation to lay them on a roof like structure on our rooftop, but later changed my mind to implement a ground level layout to avoid risks with wind, and also to be able to remove the structure if required and be able to adjust the angle of the panels during different months.
Swisstek Aluminum had all the parts I required as their
ground mounted solar range was complete and came with an engineering drawing and first-class support from the engineer Yohan who advised me and helped me many times with my questions. Be sure to check the
PDF of all the parts and how they are connected together. The only issue I faced was that the 40mm T clamp nut they provided was not exactly the length it was supposed to be, since my panels were 30mm high. So, Yohan found a place where I could get the necessary replacements from outside Swisstek since the direct replacements would have taken quite a long time. The final list of items I purchased are as follows, and Swisstek offered a generous discount which was very welcome.
Installation and Configuration
The installation and configuration, including the Solar panel structure and wiring was 100% DIY by me, with most of the wires, MC4 connectors etc. purchased from Sarath Enterprises Kirulapone. I purchased Schneider AC isolators and PV surge protectors from Bianco. I already had a good surge protection for the CEB connections, so I did not need new ones. I bought a 125A
DC MCB, and good quality
lugs and a wire
cutter and crimp tool from Amazon which was really helpful since I had a complex wiring for the batteries in parallel.
The final wiring looks quite complex and includes a combiner box where the two LiFePO4 batteries are combined.

The objective is to make everything balanced - i.e. the length of wires to the busbar (combiner) box, and then the output from the busbar to the inverters, where again I used wires of exact same length. Note that there are two wires coming from the potive and negative terminals of each battery to the busbar (i.e. 4 wires incoming). Then from the busbar to each inverter another two wires each (i.e. 4 wires outgoing).
Since this was a 10KW system in parallel, I used 2 AWG / 35mm2 wires for all DC battery connections. All PV (Solar) connections were 12 AWG / 4mm2 as per specifications, and all outgoing AC wires were 8 AWG / 10mm2 from ACL.
Above is the wiring of the combiner box / busbar box. Note each battery is connected from the top and the bottom sides, and the inverters take the power through the wires connected to the sides. So, on average no more than 100A should flow across any location of the busbar.
The batteries can be disconnected through the DC MCB. The power is supplied from the busbar to the top (connection #1 and #3) while the switch output to each inverter is taken from the bottom (connection #2 and #4). I had to take the thick wires in quite a large loop to make sure the switch was fixed in the standard manner (i.e. off when down and on when up) and to align it correctly with the wiring symbol on the MCB, where the higher potential voltage should be at the top - for this MCB and as per its diagram below printed on the front. ** UPDATE: See comment at the end **
The only problem I encountered after connecting the two batteries in parallel with a CAN connection to the inverters as per the GSO manual was an issue with the DIP switch configuration. I got a code 04 (low battery) and code 20 (BMS communication error). I contacted Ryan on a Sunday night, and he immediately told me what needed to be tweaked! I had to connect the master CAN to the Growatt inverter and the RS4581 to the slave battery RS4581. Then the DIP 00001000 for the Master and 00000000 for the Slave battery. The GSO manual needs to be updated to make this setting clear, but the support of Ryan on a Sunday night and within minutes was extremely commendable and shows how helpful he really was.
Below is the visiting card for Ryan Zhang / GSO, and I believe he will be happy to help anyone else with the purchase and installation of batteries in Sri Lanka.
Please also reach out to Sofia Wang (sofia.wang@growatt.com) from Growatt for any sales inquiries directly from Growatt. I am sure that importing directly from the manufacturers in China would ensure the best quality, service, warranty and price for any installation.
Operation
Although I configured the Growatt Shine dataloggers, I do not like the mobile app since its difficult for me to read the data. So, I use the website at
https://server.growatt.com/login instead. For anyone looking for the 'key' requested for any changes through this website, its 'growattyyyymmdd'- where yyyymmdd should be replaced with the current date.
The above graph shows the energy trend for one of the inverters. As you can see, section A is during the morning sunlight when the Solar production (in blue) starts up and reaches its peak. The consumption (in red) is much lower, and the extra production charges the batteries. Section B is after the batteries are fully charged. Notice that the inverter does not generate more power than needed, so actually most of the power I generate during this time is wasted - unless it's used. Since each REC TP4 panel is 370W peak and the 14 panels generate about 5.2KW peak, even the use of three 24,000 BTU and two 13,000 BTU Panasonic Inverter ACs operating together does not require 5KW of power. So, although I designed the solar panels to allow an angle alteration as per the following solar angle each month, I might not need to change it, since I generate too much power than I already need.
Solar Angle to Mt Lavinia
Jan Feb Mar Apr May Jun
67° 75° 83° 91° 99° 106°
Jul Aug Sep Oct Nov Dec
99° 91° 83° 75° 67° 60°
I have configured the ourput source priority of the Growatt SPF 500ES to SBU in program #1 - i.e. Solar is used first, then Battery and finally Utility. The charger source priority in program #14 is set to OSO - Only Solar. So the batteries are charged only using Solar power.
Closing Remarks
I posted this on my blog since I couldn't find a good way to search through the DIY Off Grid Solar group Facebook page in Sri Lanka - but that maybe because I am not aware of how FB pages work. Anyway, I believe Google indexing this article will make it available to anyone out there.
I am still analyzing the output and performing optimizations as I learn, and I am thankful to everyone who has helped me in this journey!
** UPDATE: Use of my polarized DC MCB is not correct **
Thanks to Jaanaka Wimaladharma of the DIY group for the following
comment which I paste below. I fully agree that I have made a mistake here, and hopefully this comment will help someone else avoid it.
To tell you the truth these kind of polarized breakers are not suitable for this purpose as polarized breakers expect the current to be flowing only in one direction (following the markings). However in case of Hybrid Off Grid inverters the current flow will be in both directions charging vs discharging.
There is a risk of the DC Arc not getting extinguished if the switch was operated when the current is flowing in the opposite direction.
That is to say if somebody switches the breaker off when inverter is drawing a heavy current from the battery there is a likelihood for the breaker to catch fire. Controlled testing has proven this point. So that is something to keep in mind if you decide to use polarized breakers in this configuration.
In that context even if you wire the breaker assuming that the current flow would be from the battery to the inverter, it makes no difference. So you could shorten the wires. However the risk which was explained above will remain.